Pathmonk automatically generates your first batch of microexperiences using AI, but you can customize any of them to better match your messaging, tone, and goals.
Learn more about what is a microexperience? and Best practices for creating high-performing microexperiences.
How to edit text in your microexperiences
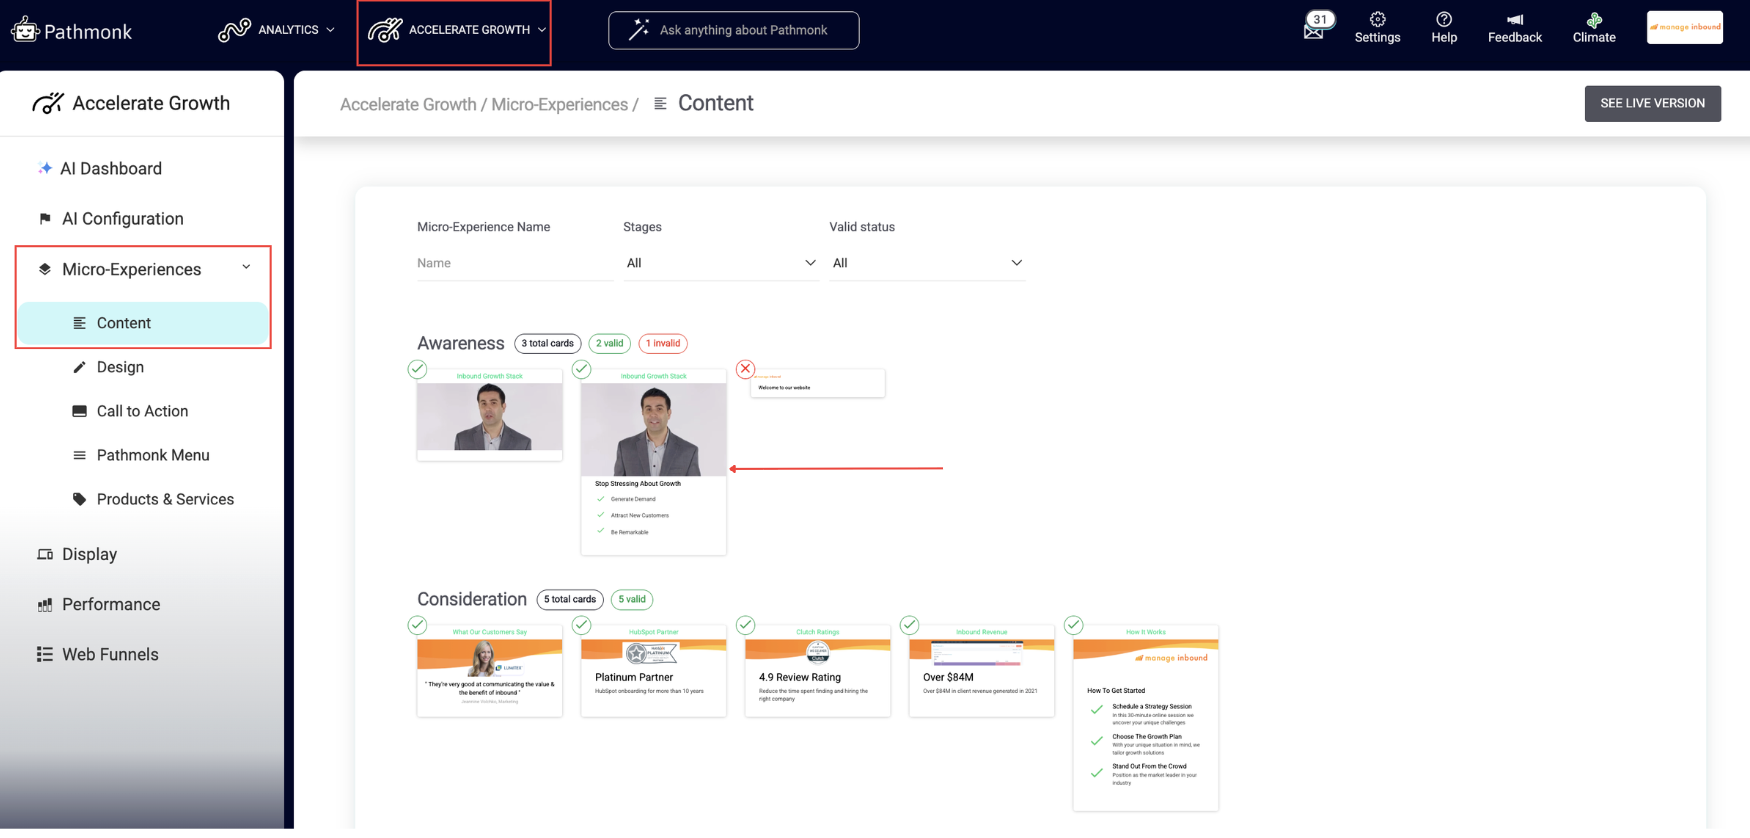
1. Log in to your Pathmonk account and go to the Accelerate Growth tab on the top menu
2. Click on Microexperiences > Content
3. Click on a microexperience card
4. Click directly on the sentence that you want to edit. Once happy with it, click on the green check icon to save. To undo editing, click on the red X.
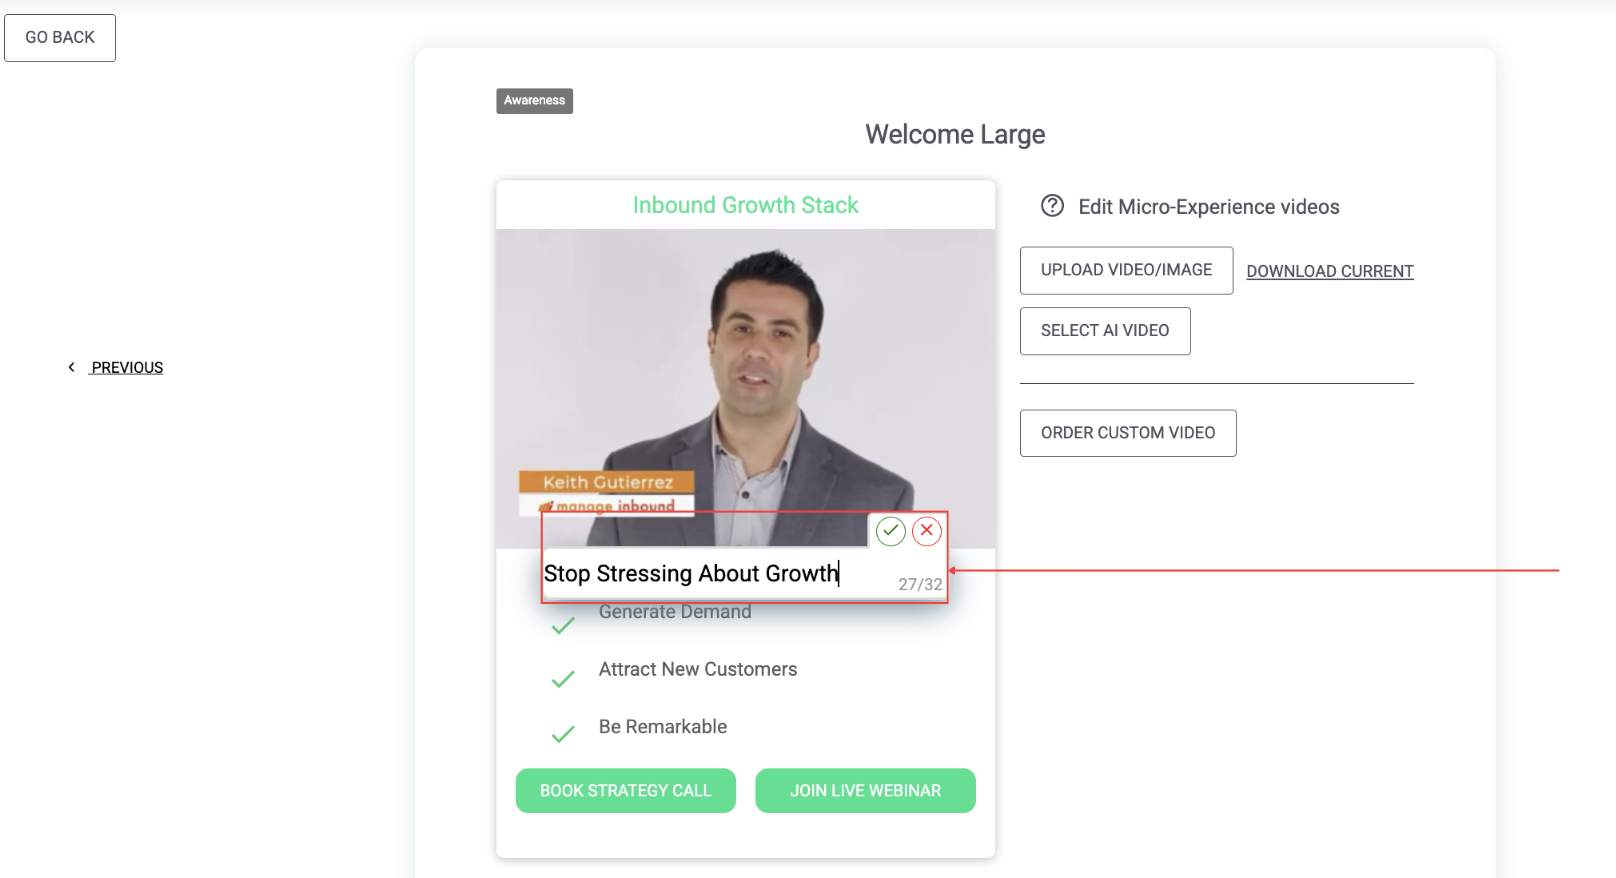
Each text field in a microexperience has a built-in character limit. To preserve the template size and ensure a clean, easy-to-read view for your website visitors. Once the character limit has been reached, no additional text can be entered.
How to edit images in your microexperiences
Follow the same steps and go to your Microexperiences > Content tab. Then, click on any card to edit directly. Click on the image box and upload the new image.

Image requirements
- Format: PNG
- File Size: 500kb
- Width: 390px
- Length Medium: 180px
- Length Large: 250px
When you see a red warning banner after uploading your image, it means the image dimensions, size or format did not match the requirements of this microexperience. Go ahead and correct the dimensions, size, or format. The file format, size, and dimensions are listed for reference, just hover over the image before clicking on the plus icon.
How to edit videos in your microexperiences
Follow the same steps and go to your Microexperiences > Content tab. Then, click on any of the Awareness cards to edit directly.
⚠️ At the moment, only Awareness-stage cards support multimedia format.
Once you’ve opened the card, click on the video box to choose how you want to configure your video. You’ll see three options:
1. Upload your own video or image (recommended)
Uploading your own asset is the best way to ensure brand consistency and increase trust.
Supported formats
Image: PNG
Video: MP4
Size limits
Images: up to 500kb
Videos: up to 20MB
Dimensions: 390px width × 250px height
After uploading, your video will appear immediately inside the microexperience preview. If the dimensions or file size don’t match the requirements, you’ll see a red banner prompting you to adjust the file before saving.
2. Select an AI-generated video
You can also choose one of Pathmonk’s built-in AI avatars for a quick setup. From here, you can configure:
Avatar style
Background (e.g., modern office, concrete wall, abstract texture)
Subtitles (on/off)
This option is ideal for fast deployment, though we recommend switching to a custom video for the best engagement and brand alignment.
3. Order a custom avatar video
If you want a fully personalized avatar video, you can submit a request directly from the editor. You’ll need to provide:
Selected avatar
Language
Subtitles (on/off)
Optional: custom background image URL
A transcription (up to 380 characters) for the avatar to deliver
Your request is automatically sent to support@pathmonk.com. Custom videos are delivered within 72 hours, and you will be notified once the video is ready.
How to add emojis to your microexperiences
You can use emojis inside any text field in microexperiences by inserting the decimal (dec) emoji code from the W3 emoji library. This ensures emojis render correctly across all browsers and devices.
Find the emoji you want to use in the W3 emoji library.
Copy its decimal (dec) code.
In your microexperience text field, type:
&#+ the decimal code
The emoji will appear automatically in the preview once saved.
Examples
Waving hand →
👋Winking face →
😉
Feel free to combine emojis naturally within your text, just repeat the same format for each one.
How to preview your changes
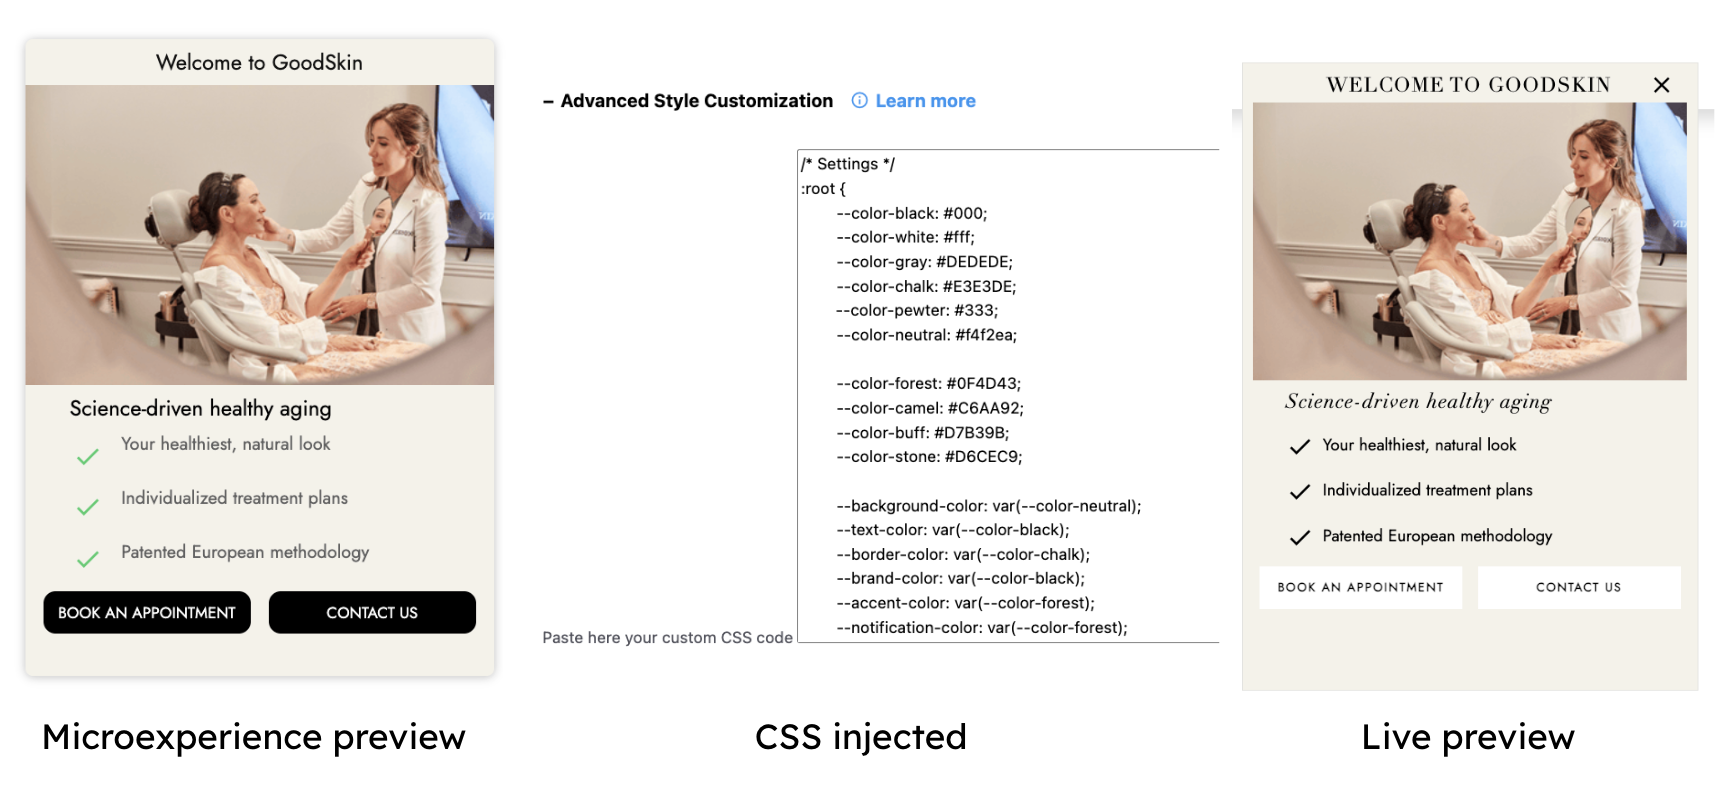
You can edit text, images, or videos directly inside the microexperience editor. However, if you’ve added custom branding via CSS, the editor preview won’t reflect those visual changes.
To see the final version exactly as it will appear to visitors:
Go to the preview page:
https://crm.pathmonk.com/dashboard/assistant/smartcards_previewSelect the microexperience you want to test.
Click See live to display the full, styled version.
This preview simulates the real visitor experience, including any custom CSS applied.
Not seeing a new image or video?
If your updated image or video doesn’t appear when previewing, it’s most likely due to browser caching. Browsers sometimes store older assets, which prevents new uploads from showing immediately.
Fix: Clear your browser’s cached images. Once the cache is cleared, refresh the preview and your new asset should display correctly.
If you still need help with your microexperiences, get in touch with our team at support@pathmonk.com and we'll get you ready for success.
Was this article helpful?
That’s Great!
Thank you for your feedback
Sorry! We couldn't be helpful
Thank you for your feedback
Feedback sent
We appreciate your effort and will try to fix the article